Formatting Library Content (Word)
Administrator Help Topic
When Content Library document sections are inserted into a “target” document, they will inherit formatting according to the Word Styles defined in that target document. The target document can be an open Word document into which you’re directly inserting content from the Content Library, or it can be a document template that is the basis of an outline-driven output from the Excel Tool.
For the inserted Content Library doc sections to properly inherit the formatting from the target document’s Styles, doc sections must be “clean” – without any extraneous formatting that might be pasted in from other sources like the internet – and formatted using Word’s Styles.
TIP 1: Start with a cleanly formatted document
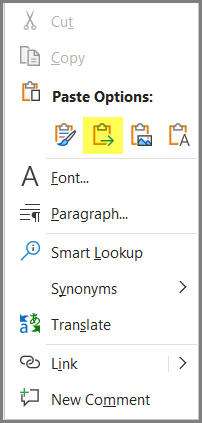
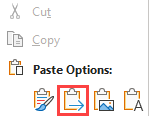
RFP Response Builder automatically cleans the formatting when you select text in any Word document and click the Add button in the Content Library panel to initially add it to the library. When you edit and paste content into an existing doc section, you’ll need to do the same by selecting Word’s Merge Formatting paste option that’s available when you use right-click on your mouse.
When you paste using Merge Formatting, make sure that you paste into a spot that’s formatted with the Normal style, unadulterated.
TIP 2: Use Word’s Styles – and ONLY Word’s Styles – to format text in the document
Once cleanly formatted content has been pasted into the Content Library doc section, you can use Word’s Styles to further format the text. For example, you might highlight text and format it as a Heading 1 or Heading 2 Style, which not only formats the text as a nice-looking heading, but also marks the text for possible inclusion in tables of contents.
After formatting text using Styles, do not further format the selected text by adjusting the font, font size or color, as those adjustments will also be applied when the text is inserted into the target document. For example, if you format text in a doc section using Heading 1, then make the selected text orange, when it’s inserted into the target document it will inherit the target document’s Heading 1 formatting, but then also apply the orange color to the text.
It’s not important how the Styles look in the source (library) document section, but rather how they’re defined in the target document since the inserted content will inherit the formatting of the Styles in the target document. [CC1] If you don’t like the way it looks in the source doc section itself, do NOT modify the text directly, but instead modify the Style for the entire doc section by right-clicking on the Style and clicking Modify.
See The Importance of Styles for more information.


Word's Merge Formatting

