Managing Doc Templates (Excel or Word)
Administrator Help Topic
A user can choose the cover page, headers/footers, styles and/or formatting for their RFP Response documents by using a Doc Template file. This template will define the default fonts, Styles and header/footer for the output document. You can add multiple Doc Templates for your users to choose from. These templates can be added and managed via Settings >> Admin settings >> Add/edit Doc Templates.
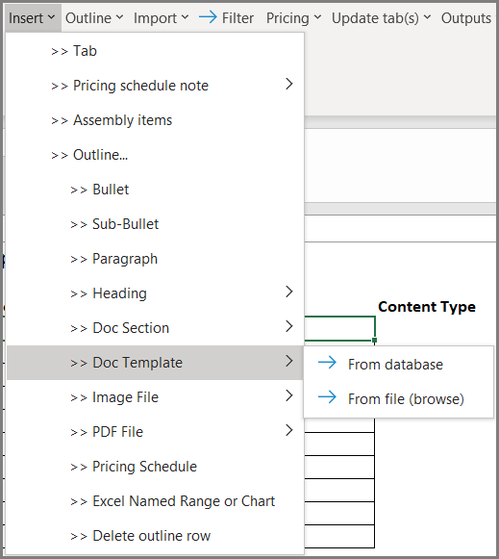
Users can insert a Doc Template into the Outline (in Excel) in the following ways:
Users can insert a Doc Template into the Outline (in Excel) in the following ways:
- From the database, where you as the Admin have created doc templates that are shared across all users within your company.
- By browsing for a Word doc/docx file, which allows the user to choose any doc/docx file. Users can browse for the original RFP if they need to respond within the RFP document and want to use it as the formatting template for their outline-based response.

Adding a Doc Template to Database (Excel or Word)
- First, create the Doc Template with the formatting you want to use for this template.
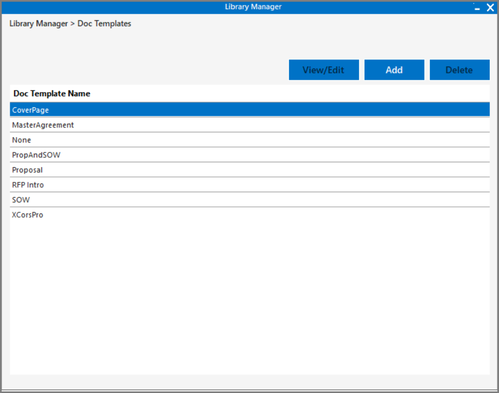
- Go to Settings >> Admin settings >> Add/edit Doc Templates
- Click the Add button on top right
- Browse for the template you created in step 1

Creating a "Clean" Doc Template in Word
We strongly recommend that you start from a "clean slate" from a formatting and Word Styles perspective when creating Document Templates and Doc Sections from existing Word documents, as those existing documents may have fonts and styles that are inconsistent with the formatting you want in the new document. We suggest creating new Doc Sections and templates as follows:
See The Importance of Styles for more information.
- Open a new, "clean" Word document
- Select all the text in your existing Word document and copy it
- On your new document, click Edit >> Paste Special, Unformatted Text (this ensures that none of the formatting for the text is brought over from the existing document)
- In Styles, define the headers using the Heading 1, Heading 2 or Heading 3 styles, making sure that it fits appropriately within your table of contents structure
- Re-apply formatting as necessary (bold, bullet points, etc.) using Word's formatting toolbar
- Copy, paste and/or insert graphics and images as necessary
- Leave a blank line at the bottom of the document and save it under the name of your choice
- Save the document leaving out blanks and special characters (e.g., “RFP_Response_Template”).
- Make sure the file extension is .dot or .dotx (template) when saving a Document Template.
See The Importance of Styles for more information.
